Django 教程
- Django 基础教程
- Django 环境配置
- Django 创建项目
- Django 生命周期
- Django 管理员界面
- Django 创建视图
- Django URL映射
- Django 模板系统
- Django 模型(Model)
- Django 页面重定向
- Django 发送邮件
- Django 泛型视图
- Django 表单处理
- Django 上传文件
- Django Apache配置
- Django Cookies处理
- Django Session会话
- Django 缓存
- Django RSS
- Django Ajax应用
- Django 快速入门
- Django快速入门-模型
- Django快速入门-视图
- Django快速入门-表单
Django 上传文件
对于Web应用程序,以便能够上传文件(资料图片,歌曲,PDF格式,文字......),它通常是很有用的。让我们在这一节中来讨论如何使用Django上传文件。
上传图片
在开始开发图片上传之前,请确保Python的图像库(PIL)已经安装。现在来说明上传图片,让我们创建一个配置文件格式,在 myapp/forms.py -
# Filename : example.py
# Copyright : 2020 By Nhooo
# Author by : www.cainiaojc.com
# Date : 2020-08-08
#-*- coding: utf-8 -*-
 from django import forms
 class ProfileForm(forms.Form):
    name = forms.CharField(max_length = 100)
    picture = forms.ImageFields()
正如你所看到的,这里的主要区别仅仅是 forms.ImageField。ImageField字段将确保上传的文件是一个图像。如果不是,格式验证将失败。
现在,让我们创建一个 “Profile” 模型,以保存上传的资料。在 myapp/models.py -
# Filename : example.py
# Copyright : 2020 By Nhooo
# Author by : www.cainiaojc.com
# Date : 2020-08-08
from django.db import models
 class Profile(models.Model):
    name = models.CharField(max_length = 50)
    picture = models.ImageField(upload_to = 'pictures')
    class Meta:
       db_table = "profile"
正如所看到的模型,ImageField 使用强制性参数:upload_to. 这表示硬盘驱动器,图像保存所在的地方。注意,该参数将被添加到 settings.py文件中定义的MEDIA_ROOT选项。
现在我们有表单和模型,让我们来创建视图,在 myapp/ views.py -
# Filename : example.py
# Copyright : 2020 By Nhooo
# Author by : www.cainiaojc.com
# Date : 2020-08-08
#-*- coding: utf-8 -*-
 from myapp.forms import ProfileForm
 from myapp.models import Profile
 def SaveProfile(request):
    saved = False
    if request.method == "POST":
       #Get the posted form
       MyProfileForm = ProfileForm(request.POST, request.FILES)
       if MyProfileForm.is_valid():
          profile = Profile()
          profile.name = MyProfileForm.cleaned_data["name"]
          profile.picture = MyProfileForm.cleaned_data["picture"]
          profile.save()
          saved = True
    else:
       MyProfileForm = Profileform()

    return render(request, 'saved.htmll', locals())
这部分不要错过,创建一个ProfileForm 并做了一些修改,添加了第二个参数:request.FILES. 如果不通过表单验证会失败,给一个消息,说该图片是空的。
现在,我们只需要saved.htmll模板和profile.htmll模板,表单和重定向页面−
myapp/templates/saved.htmll −
# Filename : example.py
# Copyright : 2020 By Nhooo
# Author by : www.cainiaojc.com
# Date : 2020-08-08
<html>
    <body>
       {% if saved %}
          <strong>Your profile was saved.</strong>
       {% endif %}
       {% if not saved %}
          <strong>Your profile was not saved.</strong>
       {% endif %}
    </body>
 </html>
myapp/templates/profile.htmll −
# Filename : example.py
# Copyright : 2020 By Nhooo
# Author by : www.cainiaojc.com
# Date : 2020-08-08
<html>
    <body>
       <form name = "form" enctype = "multipart/form-data"
          action = "{% url "myapp.views.SaveProfile" %}" method = "POST" >{% csrf_token %}
          <div style = "max-width:470px;">
             <center>
                <input type = "text" style = "margin-left:20%;"
                placeholder = "Name" name = "name" />
             </center>
          </div>

          <br>
          <div style = "max-width:470px;">
             <center>
                <input type = "file" style = "margin-left:20%;"
                   placeholder = "Picture" name = "picture" />
             </center>
          </div>

          <br>
          <div style = "max-width:470px;">
             <center>
                <button style = "border:0px;background-color:#4285F4; margin-top:8%;
                   height:35px; width:80%; margin-left:19%;" type = "submit" value = "Login" >
                   <strong>Login</strong>
                </button>
             </center>
          </div>
       </form>
    </body>
 </html>
接下来,我们需要配对网址以开始: myapp/urls.py
# Filename : example.py
# Copyright : 2020 By Nhooo
# Author by : www.cainiaojc.com
# Date : 2020-08-08
from django.conf.urls import patterns, url
 from django.views.generic import TemplateView
 urlpatterns = patterns(
    'myapp.views', url(r'^profile/',TemplateView.as_view(
       template_name = 'profile.htmll')), url(r'^saved/', 'SaveProfile', name = 'saved')
 )
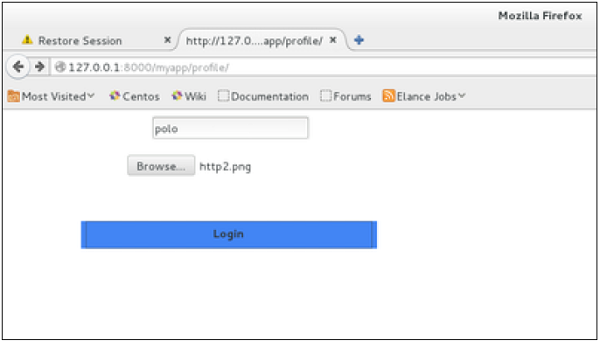
当访问"/myapp/profile",我们会得到下面 profile.htmll 模板显示 −
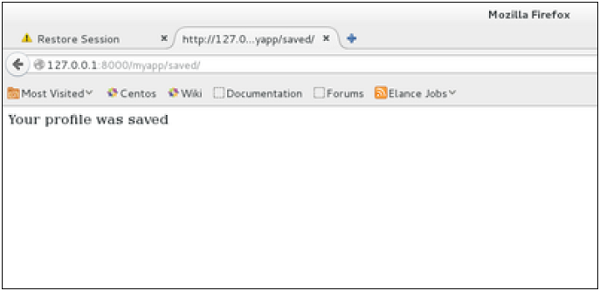
在格式提交后,已保存的模板将显示如下 −
这里我们只讲解图片上传示例,但如果想上传其他类型的文件,只需更换 ImageField 在这两个模型及 FileField 表单。